What is Crown Molding
Crown molding (or moulding) is simply the decorative piece that covers the top of your kitchen cabinets. They are typically used to finish and complete the aesthetic look in the kitchen. Installing the molding helps to prevent dust from accumulating on top of the cabinets and does not leave a gap from the wall cabinets to the ceiling.
With high ceilings, some people may even have the capability of having crown molding and still room for decorative storage above. More traditionally, the cabinets will go all the way up, leaving about 2 inches of room for the crown molding. This form of molding is more commonly found on Shaker-style cabinets.
What Types of Crown Molding Are There
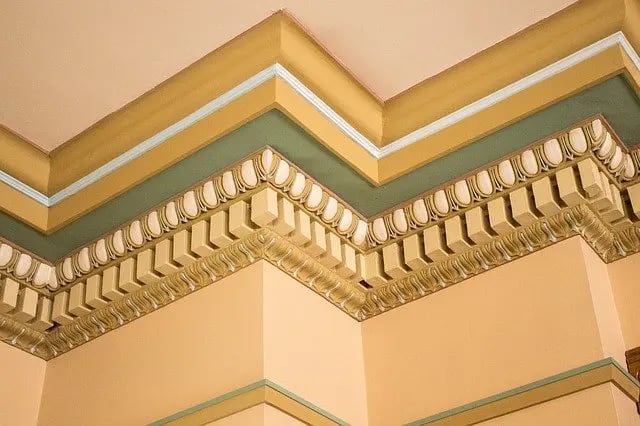
 photo: The Moulding Company
Crown molding is typically broken down into 2 distinct styles: crown and flat molding.
The crown usually has a curvature shape to it that adds more flow to the overall design. This type is commonly paired with raised-panel doors. On the other hand, flat molding has a straight surface that emphasizes a diagonal on top of the flat-panel door. Both moldings can be elevated with a filler underneath. Elevated molding can compensate for a higher ceiling.
Not all kitchens can have the luxury of molding but have a soffit on top. Certain 2-story homes will have a soffit, which is a box built down from the ceiling that encompasses electrical and piping from the floor above. The soffit greatly reduces much of the desired ceiling height typically needed for the molding.
To remedy this, scribe molding is recommended here. Scribe molding is a thin strip of wood typically added between a cabinet and the wall to create a seamless look. The scribe can also hide any imperfections the soffit has as well.
Similar to the scribe molding, customers might even have a filler piece on top of the kitchen cabinets. The filler can essentially be used to create a box that extends up to either the ceiling or the soffit. There are two ways to utilize this method of molding, flush with the cabinets or protruding.
The filler can either be flush with the cabinets and simply just fill in space on top. It would result in a clean look to the cabinet itself. The other is to have the filler protrude out from the cabinet just slightly to imitate the crown molding aesthetic. Since not all ceilings can always have space for molding, these options are welcome to those wanting creative ideas.
Can Crown Molding Be Used Outside The Kitchen
Crown molding is more commonly found on the top of traditional kitchen cabinets but is not limited to just that. Designers have been innovating with the idea of continuing the kitchen design throughout multiple rooms of the house. Particularly, living and dining rooms are the focus where customers are using crown molding.
The living room is commonplace to decorate with molding. Homes that connect the living and kitchen can tend to have the molding match to create a flowing design throughout the home.
Along the ceiling walls, crown molding pieces are typically cut to surround an entire room. Molding pieces are commonly available in long pieces to accommodate long rows of kitchen cabinets. This doesn’t limit the creativity of many designers. Using those pieces of crown molding throughout the home brings a sense of unity in each individual room.
Some people may not like the idea of grabbing that many additional pieces of moulding with their kitchen but might have small leftover pieces from their kitchen installation. Using those pieces to decorate your window frames is another creative way of utilizing those resources.
Similar to the kitchen cabinets, the crown molding is used to decorate the top of the window frames. Many may argue this is overkill, but others like the idea to extend the kitchen concept to other rooms.
How is Crown Molding Installed
To begin, these are the tools needed to cut and install crown molding:
- Measuring tape
- Level
- Miter Saw
- Nail Gun
- Coping Saw
- Utility Knife
Since the molding is typically a diagonal piece of wood, it sits in front of backing and filler to help position the crown in place. The backing is first attached to the tops of the wall cabinet to act as an anchor point for the molding to attach to. Then, the crown is cut at 45 degrees for an L-shape corner or 22.5 degrees for diagonal corner cabinets.
After being cut, the molding is assembled together on the ground with the joints flush. Finally, the crown is lifted up and installed level and square to the backing pieces. If a filler is needed for the crown installation, it would be first put onto the backing before the crown molding sits on top.
Should You Install Crown Molding
Crown molding is an iconic look for traditional cabinets. Without it, wall cabinets are typically left incomplete and need the finished look. This applies to kitchens that can afford to have the molding installed. Kitchens that have a soffit typically cannot get it due to the restrictions of the depth of the soffit.
Some might want to have additional storage space over the cabinets for potted plants or ceramic kitchen decorations. While this option may solely be decorative, the majority of American-style kitchen cabinets need molding to finish the kitchen aesthetic.
What do you think? Should kitchens have crown molding in them?


